0
Your Cart

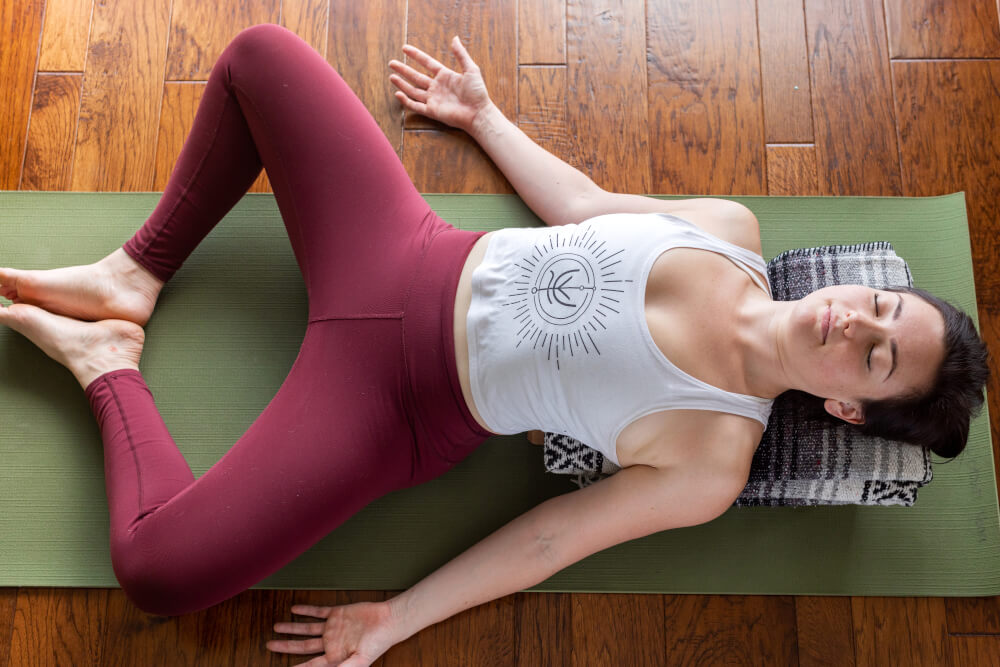
Yoga for Stress Relief

yoga for stress release

Yoga is known for helping to calm the mind and help alleviate stress. Below is a Yoga flow containing poses that are particularly good for relieving stress. Note: The stress-relieving poses are in bold, transitional poses are in italic

Child’s Pose

Resting Posture

Benefits: lymphatic nervous system

Instructions for child’s pose

1. Rest on your knees. Kneel on your yoga mat, resting your buttocks against your heels. Place your palms on your thighs and bring your feet close together. Inhale and exhale slowly, allowing your shoulders to relax.

2. Bow forward. In your own time, lower your upper body onto your thighs on an exhale. Extend your arms out in front of you with your palms face down on the mat. Keep your big toes touching and spread your knees wide enough for your torso to lower between your thighs. If pregnant, be sure to spread your knees wide enough to avoid putting pressure on your abdomen.

3. Lower your forehead. Rest your forehead on your yoga mat and relax your neck. For added comfort, consider placing a blanket, bolster, pillow, or your hands beneath your forehead. Close your eyes and relax your jaw. If you experience a headache during child’s pose, slowly lift your back and shoulders, keeping your neck relaxed, and sit up to take a break.

4. Consider variations. If your hip joints are tight, consider keeping your knees together and lowering your torso on top of your thighs. For a more passive pose, let your arms relax behind you along your thighs with palms facing up. Place a rolled towel below your shins to take the pressure off your ankles. Use caution when practicing child’s pose if you’ve suffered a knee injury.

5. Relax. Allow your muscles to loosen while you rest against your mat. For added support, place a folded blanket or pillow between your calves and the bottom of your thighs. Keep your eyes closed and focus on your body, staying mindful of any physical sensations.

6. Breathe. Explore different breathing exercises while practicing child’s pose. Inhale slowly, feeling your lungs expand against your back body. While exhaling, concentrate on releasing tension from your back and stomach. Continue this breathing exercise for one to three minutes. From here walk the hand back towards you and come up onto all fours for Cat/Cow

Cat/Cow

Stretches lower back

Massages organs

Instructions for Cat Cow Pose

  1. Start on your hands and knees with your wrists directly under your shoulders, and your knees directly under your hips. Point your fingertips to the top of your mat. Place your shins and knees hip-width apart. Centre your head in a neutral position and soften your gaze downward.
  2. Begin by moving into Cow Pose: Inhale as you drop your belly towards the mat. Lift your chin and chest, and gaze up toward the ceiling.
  3. Broaden across your shoulder blades and draw your shoulders away from your ears.
  4. Next, move into Cat Pose: As you exhale, draw your belly to your spine and round your back toward the ceiling. The pose should look like a cat stretching its back.
  5. Release the crown of your head toward the floor, but don’t force your chin to your chest.
  6. Inhale, coming back into Cow Pose, and then exhale as you return to Cat Pose.
  7. Repeat 5-10 times, and then come back to all fours, step into plank pose.

Cobra Pose

Opens Chest

Relieves muscle pain

Instructions for Cobra Pose

  1. Place your palms flat on the ground directly under your shoulders.

2. Bend your elbows straight back and hug them into your sides

3 . Pause for a moment looking straight down at your mat with your neck in a neutral position. Anchor your pubic bone to the floor.

4. Inhale to lift your chest off the floor. Roll your shoulders back and keep your low ribs on the floor. Make sure your elbows continue hugging your sides. Don’t let them wing out to either side.

5. Keep your neck neutral. Don’t crank it up. Your gaze should stay on the floor. From here come back to all fours (tabletop position)

Extended Puppy Pose

Calms mind

Stretches muscles

Instructions for Extended Puppy Pose

  1. Bring yourself to a tabletop position with your wrists underneath your shoulders and knees underneath your hips.
  2. Keeping your glutes stacked above your knees, slowly walk your hands away to reach for the front of your mat.
  3. Allow your chest to sink towards the mat as you bring your forehead to the ground or a block. If it’s more comfortable, you can bring your chin to rest on the ground instead.
  4. Let your chest get heavy as you rest in this pose. Hold for approx. 10 breaths. Come back all fours, tuck the toes and push back to Downdog. Walk the feet towards the hands and gently roll up coming to stand in Tadasana (Mountain Pose)

Wide Legged Forward Fold

Cools Nervous system

Relives Stress, Fatigue & mild depression

Instructions for Wide-Legged Forward Fold

  1. Begin in Mountain Pose (Tadasana). Bring your hands to your hips. Turn to the left and step your feet wide apart. Turn your toes slightly in and your heels slightly out so the edges of your feet are parallel to the edges of your mat. Align your heels.
  2. Inhale and lengthen your torso, reaching the crown of your head up toward the ceiling. Exhaling, fold forward at the hips. Keep the front of your torso long. Drop your head and gaze softly behind you.
  3. Bring your hands to rest on the floor between your legs. Keep your elbows bent and pointing behind you. If your hands do not come to the floor, rest them on yoga blocks.
  4. Shift your weight slightly forward onto the balls of your feet.
  5. Keep your hips aligned with your ankles, then walk your hands back even further. Work toward bringing your fingers in line with your toes (and eventually with your heels), and bringing your elbows directly above your wrists.
  6. Strongly engage your quadriceps and draw them up toward the ceiling.
  7. Lengthen your spine on your inhalations and fold deeper on your exhalations.
  8. Bring the crown of your head down further, resting it on the floor if possible.
  9. Hold for up to one minute. To release, bring your hands to your hips. Press firmly through your feet and inhale to lift your torso with a flat back. Step your feet together and return to Mountain Pose.

Eagle Pose

Improves concentration

Strengthen and stretches muscles

Reduces Fatigue

Instructions for Eagle Pose

Begin in Chair Pose (Utkatasana) with both legs bent and your arms by your sides. Alternatively, start by standing with soft knees.

  1. Transfer your weight into your left foot.
  2. Lift your right foot up off the floor.
  3. Cross your right thigh over your left thigh as high up the thigh as possible.
  4. Hook your right foot around your left calf.
  5. Bring both arms out in front of you and parallel to the floor.
  6. Bend your arms and cross the left arm over the right, hooking at the elbows. With arms hooked, draw your forearms together and wrap your right palm around your left palm, crossing at the wrists. (Whichever leg is on top, the opposite arm should be on top.)
  7. Lift the elbows to the height of your shoulders while keeping the shoulders sliding down away from your ears.
  8. Keep your spine perpendicular to the floor and the crown of the head rising.
  9. Hold for 5 to 10 breaths.
  10. Repeat on the other side.

Seated Forward Fold

Stretches muscles

Provides relief in menopause, kidney, liver and ovaries

Relaxes mind

Instructions for seated forward fold

Begin by coming to sit in Staff Pose (Dandasana) with your legs straight in front of your body.

  1. Bring your arms straight out to the sides and up over your head, reaching toward the ceiling.
  2. Inhale and draw your spine up long.
  3. As you exhale, begin to come forward, hinging at your hips. Imagine your pelvis as a bowl of water that is tipping forward.
  4. On each inhale, lengthen your spine. You may come a bit out of your forward bend to do this.
  5. On each exhale, deepen into your forward bend. Imagine your belly coming to rest on your thighs, rather than your nose coming to your knees. This will help you keep your spine long.
  6. Keep the neck as the natural extension of your spine, neither cranking it to look up nor letting it go completely.
  7. When you have come to your full extension with the spine long, decide whether you want to stay here or let your spine round forward.
  8. Take hold of your ankles or shins, whichever you can reach. You can also use a strap around your feet. Keep your feet flexed strongly throughout. Hold for about 10 breaths and then release the feet and gently roll down to a flat back

Bridge Pose

Gentle stretch of back and legs

Instructions for Bridge Pose

  1. Start by lying on your back.
  2. Place your feet flat on the floor, shoulder-width apart, and keep your knees bent.
  3. Put your hands down at your sides, palms down on the floor. 
  4. Inhale and push your hips up towards the ceiling. Ensure your head, neck, and shoulders remain flat on the floor. 
  5. While holding the pose, there are a few options for your hands. You can keep your palms flat on the ground. For more of a challenge, you can interlace your fingers and push your hands on the floor to lift your torso a little higher. Alternatively, you can put them on your back, pointing your fingers toward your lower back with your thumbs to the side.
  6. Breathe deeply, holding your position for a few moments. Then, move your arms back down to the floor, exhaling while you lower your hips back to the ground. Bend the knees and then wrap the arms around them. Release the legs and  lie and your back preparing for Shoulder Stand

Shoulder Stand

Improves circulation

Soothes the nervous system

Instructions for Shoulder Stand

  1. Before beginning the Shoulderstand, make sure that there is enough room behind you. You must be able to stretch your arms out behind your head and have at least a foot between your fingertips and any obstructions. Lie flat on your back, with your feet together. Inhale while bringing your legs up to a right angle.

2, Tuck your hands under your buttocks, with your fingers pointing toward your spine. Then, as you exhale, gently raise your body by letting your hands walk down your back and push you into position.

3. Continue to move your hands up your back until you rest on your shoulders. Breathe normally, and keep your legs straight. Hold for 30 seconds; as the pose becomes easier, increase the time to 3 minutes. To come down, drop your feet halfway to the floor behind your head. Put your hands on the floor. Unroll your body vertebra by vertebra to the floor. Hand position: Put your hands on the small of your back, with your fingers toward your spine.

4 . To come out of the shoulder stand, use your core strength to lower the legs, hug the knees into the chest, then release to the mat. Preparing for Plough Pose

Plough Pose

Stretches muscles

Stimulates Thyroid

Reduces Fatigue

Instructions for Plough Pose

Lie face up so that the front of your neck is long and there’s space between the back of your neck and the floor.

Bring your knees toward your chest, then straighten your legs toward the ceiling. Using the strength of your abs—and supporting yourself with both hands at your low or mid back—lift your hips off the floor and roll up until you are supported by your shoulders.

Stack your hips above your shoulders.

Slowly lower your legs backward over your head until your toes reach the ground behind you. Rest your toes on the ground, feet flexed.

Release your hands and place your arms on the floor, palms down or with hands clasped. Press down with your outer upper arms and shoulders to create more lift along the spine.

Hold for 5 breaths or more.

To exit, unclasp your hands, press your arms and hands into the mat, and slowly roll down one vertebrae at a time. Take a few moments to allow the back to settle back into its normal curves.

 Happy Baby

Enhances mood

Calms mind & body

Reduces Fatigue

Instructions for Happy Baby Pose

Lying on your back, inhale both knees into your chest. Bring the arms through the insides of the knees and hold on to the outside edge of each foot (pinkie toe side) with each hand.

2. Tuck the chin into the chest with the head on the floor. Press the sacrum and tailbone down into the floor as you press the heels up and pull back with the arms.

3. Press the shoulders and the back of the neck down into the floor, trying to get the back and whole spine flat to the floor. If you want a deeper stretch in the hips, let the legs open a bit wider.

4. Breathe and hold for 4-8 breaths.

5. To release: exhale and release the arms and legs to the floor. Coming into Savasana

Savasana

Triggers state of relaxation

Mind and body cool down

Instructions for Savasana

  1. Separate your legs. Let go of holding your legs straight so that your feet can fall open to either side.
  2. Bring your arms alongside your body, but slightly separated from your torso. Turn your palms to face upwards but don’t try to keep them open. Let the fingers curl in.
  3. Tuck your shoulder blades onto your back for support. This is a similar movement to tucking the shoulders under in Bridge Pose, but less intense.
  4. Once you have set up your limbs, release any effort from holding them in position. Relax your whole body, including your face. Let your body feel heavy.
  5. Let your breathing occur naturally. If your mind wanders, you can bring your attention to your breath but try to just notice it, not deepen it.
  6. Stay for a minimum of five minutes. Ten minutes is better to get a deep rest.
  7. To come out, first begin to deepen your breath. Then begin to wiggle your fingers and toes, slowly reawakening your body.
  8. Stretch your arms overhead for a full body stretch from hands to feet.
  9. Bring your knees into your chest and roll over to one side, keeping your eyes closed. Use your bottom arm as a pillow while you rest in a fetal position for a few breaths.
  10. Using your hands for support, bring yourself back up into a sitting position. Bring the hands to heart centre and take a few breaths trying to maintain a sense of calmness

I hope you enjoy this practice and it brings a sense of calmness to your day. Please feel free to download the Free Ebook below so you can practice the flow at home on a regular basis

FREE Ebook – Yoga Flow to Relieve Stress

Click on the image to download

Yoga flow for Stress Relief